I have been playing around with different ways to make my teletherapy sessions as interactive as possible. One of my favorite ways has been Boom Cards. Sasha recently did a blog post about them, and she has a bunch of decks available!
My other favorite way to make my sessions interactive has been using a spinner. The assistive technology consultants in my district put together a tutorial on how to use this, and once I sat down and played around with it, I realized how easy and fun it is to incorporate into a session! Once you create a spinner, you can turn over control to your student during Zoom sessions so he or she can activate the spinner. Here is a tutorial on how to turn over access to students during a Zoom call. This tutorial is focused on sharing Boom cards, but the steps are the same for sharing access for the spinner, you just have to have your spinner up on the screen, not the Boom cards.
My other favorite way to make my sessions interactive has been using a spinner. The assistive technology consultants in my district put together a tutorial on how to use this, and once I sat down and played around with it, I realized how easy and fun it is to incorporate into a session! Once you create a spinner, you can turn over control to your student during Zoom sessions so he or she can activate the spinner. Here is a tutorial on how to turn over access to students during a Zoom call. This tutorial is focused on sharing Boom cards, but the steps are the same for sharing access for the spinner, you just have to have your spinner up on the screen, not the Boom cards.
Here is a step by step tutorial on how to create your own spinners.
1. Come up with the idea for your spinner!
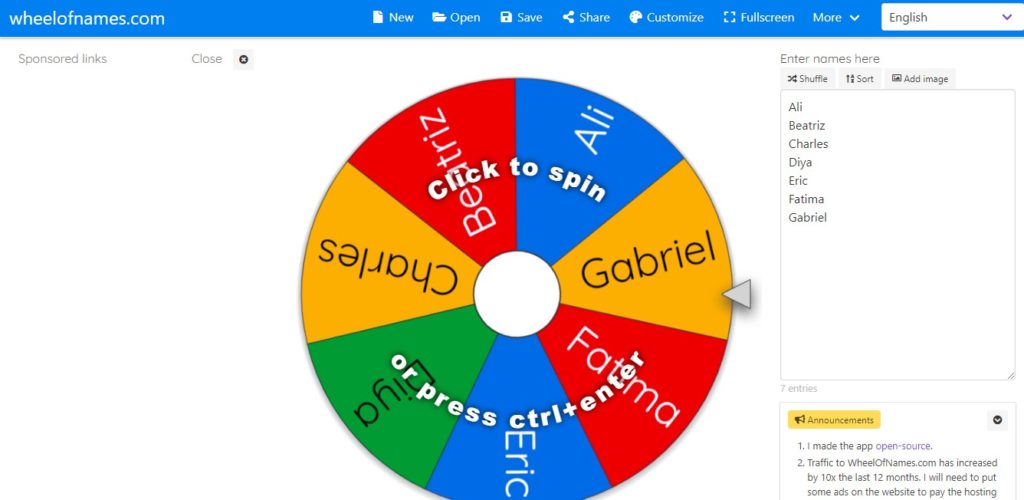
- The easiest way to make a spinner is to go to this site: the wheel of names.
- There are a ton of different spinners you can create based on your student population and your discipline. You can have student names for turn taking, exercises, yoga poses, self regulation strategies, emotions identification, music choices, pictures of certain speech sounds to practice, conversational topics or topics to write about, letters or shapes to practice – the possibilities are endless!

2. Customize your spinner
- You are able to customize the spinner even more for your specific students. You can have words only, pictures only, or pictures and words. You can adjust the colors and add (or remove) fun effects and music. See the videos below for a tutorial on how exactly to do these things.
3. Use the Spinner!
- The easiest way I have found to use the spinner is to import it into a Google Slides lesson and access it easily from there. Check out this video on how exactly to move your finished spinner into a Google Slide presentation.
A few spinners for you!
There are so many different ways you can use spinners. You can use the simple spinners I created and linked below in your sessions! Just copy the link into your next Google Slide presentation as I explained in the video above.
- Gross motor activities
- Topics to write or talk about
- Prewriting strokes or shapes to draw
- Letters to practice writing


Have fun spinning!
This blog is for informational purposes only. All wheels created on wheelofnames.com. Please supervise children appropriately.
Latest posts by Katie McKenna, MS, OTR/L (see all)
- 5 Items I’m Adding to my OT Toolkit This School Year - September 10, 2025
- 5 OT Tips for Creating a Regulating Morning Routine - August 13, 2025
- Thinking Ahead: Preparing for Life after Graduation - January 15, 2025


4 Responses
Hi Katie-do you know if spinners will work for students logged on from a tablet or phone? Would love to start using them, but not all of my students have access to a computer. Thanks so much!
Hi Kristin – I have had success giving students control over zoom when they have used an iPad. I haven’t tried yet on a phone! Even if they don’t have control, you should be able to click the spinner on your end and they should be able to see it. Hope that helps!
Hi. I have made my wheel but I want my students to be able to spin it and as they spin it, it will show, even just the result, on all the participant’s screen. Is this possible? Thank you.
Have you tried giving screen control to the student? Does it work that way?